Friday, July 29, 2011

They say real cheese comes from WHERE????

I am a Wisconsin girl, through and through. And the fun excursion my friends Amy, Cara and I took our kids on today proves one thing: THE BEST CHEESE COMES FROM WISCONSIN!!! Cara even had a friend visiting from Florida, who made the trip PERFECT by walking around with her camera on her neck like a real tourist, Lol!

I had been told by a friend that if you ask, they might let you see the factory. So I did...and while they couldn't take us to the room where they make the cheese (sanitary reasons, which I am GRATEFUL for!) but they had huge windows which allowed us to see the process. But our generous tour guild, Kert showed us and the kids an entire tour of the rest of the facility. It was fascinating! I never knew there was a demand for 1200 pound wheels of cheese, but I saw the picture to prove it. The wheel was ordered from Texas. I guess everything IS bigger in Texas!
Here are the kids, the sun was a little high at the time we wanted to take the picture :)

The huge windows and the view into the cheese making room.
That is the back of Kert(on the right), our wonderful, informative tour guide!

We made Will sit in the pictures and go along to the factory, although he is clearly WAY TOO COOL for such things!
From left:Will, my BFF Amy, Aidan,Sabina (those are her three wonderful babies!) then Chloe and Audrey, my two daughters. Oh how I love them all!

Chloe and Audrey showing off their hair nets for the tour.
The kids loved them, they wore them until we got home. NERDS!

These are wooden boxes filled with cheese wheels.
There was a crazy huge amount of cheese in this place!

That is a vat holding a wheel of cheese that is solidifying. Something about the whey coming out...
Kert explained it better than that. And yes, it is bigger than my daughters.

The kids are demonstrating how CHILLY it was in there. Fah-reezing!

These kids love each other so much, I just love this picture.
Oh,Aidan <3 (on the left)

Time to sample! Yummmmmmm. Those are squeaky fresh cheese curds.
They were still warm!

For information on Hennings cheese, check out their website. I honestly love their cheese over any other WI cheese maker. And we have some great ones THE BEST in our state.

Fun day, great place. Finished it off with local ice cream, scooped while we paid for our cheese:) I highly recommend making the trip if you ever get the chance. And anyone who wants to argue that cows are happier in California, please come check out Wisconsin. No question :)

Thursday, July 28, 2011

DIY Curtain Project

We have a beautiful, solid oak dining room table. It is big, heavy and has 4, yes I said 4, table leaves. These are great when we have a sit down dinner for 16...(read,NEVER) so I inevitably end up storing them. We tried storing them in the basement on shelves, but they took up too much space. We tried standing them upright in our hall closet, but with kids, it was dangerous. I had to find a place to store those monstrous things, so I would not have to look at them ANYMORE :)

So here is what I did, I sacrificed a section of my bedroom closet to make them a home. And also a place to store my American flag, apparently. If I were on the ball, it would be hanging proudly on my front porch, but since I always forget to take it down at dark, I feel disrespectful. So out of respect, it is in my closet. What?!?! Anyways...

Still ugly,huh? And did I mention there is a huge picture window directly in front of this shelf? A window that open to my front yard?  How will I ever hide these things?
On a trip to Walmart it came to me....

Here is how I did it:
I bought a $7 full size sheet in a color I liked. They have about a million to choose from. Just make sure it's a FLAT sheet. But you knew that already, right?
Then you'll need
-a sewing machine (or not, you can also use stitch witchery if you are a sewing machine - phobe)
-a seam ripper
-an iron
-a bar to hang your curtain on (I was able to use a clothes bar from my closet)
I measured the opening to my closet, and cut the sheet to the height, adding about 4 inches for the hem. Also keep your sheet at least twice the width of your opening, or you won't get any ruffle action. (Then it will look like you have a sheet hanging in your closet....)
I folded the bottom over twice to get a little weight at the bottom, as well as a straight hem. And since I was ironing, I stuck some stitch witchery in the hem as I folded  to "glue" my hem in place. It made it much easier to sew such a long straight line later.

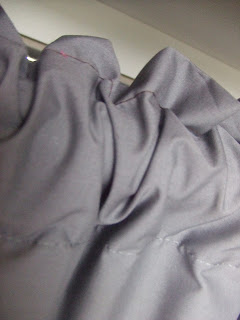
I used the factory stitched top of the sheet as my curtain top. I had to open up the sides with my seam ripper, but then you are left with an open tube.
The factory stitching is gray, and I used brown, because I was in a hurry.  
But hey, it's easy for you  to see where I sewed :)

I stitched about an inch from the top of the tube to give a little extra ruffle.


And now I have a pretty, ruffly curtain to hide my hideous oak monstrosity's! Isn't it cute? These would work anywhere, even on a window. It's a low-sew to no-sew project that takes hardly any time at all.


Wednesday, July 27, 2011

A few new bags I'd like to show off :)

I just finished listing a few new bags I made in my etsy shop. I love coming up with new styles, and this one came to me one afternoon 2 weeks ago when I was bored. I love it when that happens!


Today I got caught up on orders. It is raining a much needed rain here, so I am in comfy pants, and am working on another brand new design. One hint: It is really ruffle-ey! Now I only hope it works so I don't look like a liar. Off I go, I'll show pics when I crawl out from under all the ruffles :)

Sunday, July 24, 2011

Cute Business Card Holder Tutorial

I just found this super cute idea on The Crafty Cupboard! I can't wait to make one for myself...As a matter of fact, it's Sunday afternoon, kids are watching tv...I'm off!

If you are looking for a cute business card holder and have an ounce of craftiness in you, I think this is pretty simple. I think it would also be a cute credit card holder. If not, I'm sure I could make one for you :) Enjoy!
                    http://craftycupboard.blogspot.com/2011/03/how-to-business-card-holder.html

Saturday, July 23, 2011

This is what kids do when Mom's not looking!

I was cleaning off my camera this afternoon to make room for pics of my 12 new purses :) (FINALLY!)
Apparantly while I was cleaning my house today, Audrey, my 6 year old decided to take my camera and make a couple dozen tutorials. I picked one to share... I just love her little feet that show up every once in a while! And I should mention that I also found a bottle of nail polish in my studio. She painted her own nails just for her video. (my Mom pride is just spilling over right now!)

If you 've ever wondered the ins and outs of making Melting Bead crafts, this Tute is for you, compliments of Audrey.

Sunshine Mama: Ruffle Wreath: a tutorial

When I have a free moment or two...I plan to make myself one of these! How C-U-T-E would this be on the back of my sewing room door???
Sunshine Mama: Ruffle Wreath: a tutorial

Wednesday, July 20, 2011

Crawling my way out from under 12 purses

So it is summer, I have two kids home all the time and I still have to work to earn money. So what does this all mean? I decide to make 12 purses, which on a normal day is easy-peasy. But when all of my attention can't be focused on my work, I have found that these summer days are not very productive! So I am crawling along at a snails pace, anxious to see these finished! Basically, I'm writing this to show MYSELF that I have, in fact, made some progress :)
To keep order and to help me track what goes where, I cut out all the "parts" I need for the outside of these purses. Then I had to label them, so I would know what goes where. Thank goodness for sticky notes :)

Yes, I had to make a chart. I never makes charts, because that is too orderly for a scatterbrain such as me! But it was the only way I would know which fabric pieces I already cut, which fabrics I had to find,match and cut, and finally how to put them all back together again. I will repeat, thank goodness for sticky notes!

Ok, so to the general blog reader, it might look like I didn't get very far, that I only moved piles around a little, but REALLY I got a lot sewn and ironed! You can't see it but I finger ruffled 12 outside pockets yesterday. I was really proud of myself.

Next time I post about these purses, hopefully they will somewhat resemble something you might like to carry!
 Wish me luck.
Hold on.... the kids are calling me. Ugh.